Light
Light Cues


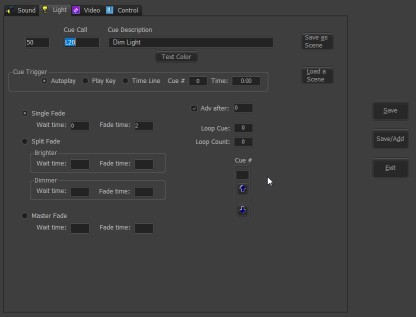
Selecting the Light tab after + on the home screen will display the above screen. The Save, Save/Add, and Exit buttons are common to all of the 4 tabs. Save will either add a new cue to the list or store any changes to an existing cue. Save/Add does the same, but returns to this screen instead of the main window. Exit returns to the main window.
 These are the first 3 columns of the cue list. That being the cue sequence number, the stage manager cue call, and the cue description. As with all cues, the color of the cue description in the list can be set.

The trigger for playing or running the cue can be either when the cue is selected, the Play key, as set from the Options menu, the time position of an already running cue, or a time of day. The number of a playing cue goes into the Cue # field and the time position, in tenths of a second, goes into Time field. If the Cue # is 0 and the Time is entered as hh:mm, the cue will play at that time. Hours greater than 12 are afternoon and evening, under 12 for morning. For the cue you are editing to be triggered this way in use, it must be the current selected cue in the cue list.
 Dimmer settings for any cue can be saved and restored as scenes. The scenes are stored in a file that can be either show specific or common depending on the "Auxiliary file source" setting in Preferences. At first use for a cue list, you will be asked if a new file should be created or you want to copy in an existing file. If new, this screen is next:
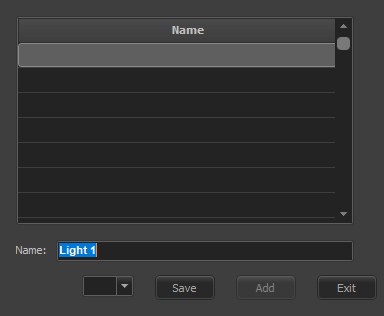 When you save a scene you may name it what you wish, Save, and it will appear as the next line item. When recalling a scene, click on one of the listed lines. To delete a scene, blank out the name. The leftmost button will change titles from Save to Delete. If you select a scene, buttons will appear to allow you to Overwrite the current channel levels with the ones from the scene, or to Add the scene levels to the current ones. A scene may be assigned to a bumpbutton. The far left dropdown is used to select the key to enable or blank to disable. Whether bump scenes are added to the existing levels or are the levels themselves is set in the "BumpOvrRpl=" entry of the CPOne.ini file. 1 is add, 0 is alone.
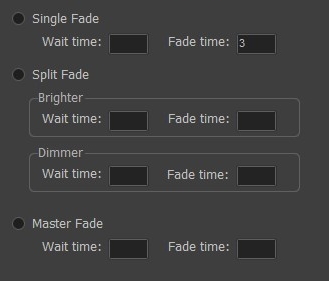 Cues can be a Single fade, Split fade or Master fade. A Single fade starts after the Wait time and proceeds over the Fade time to move all the selected dimmers to their new values, brighter or dimmer. A Split fade will treat the dimmers going brighter and those going dimmer differently according to the values set in the Wait and Fade values. A Master fade will fade out all channels, including any settings of an active submaster. All transitions are stored by channel so multiple scene fades can be active at the same time.
 If the next cue in the list an Autoplay cue, then checking here and entering some seconds will have the same effect as having this cue advance at start and inserting a Delay cue. Just saves a cue.
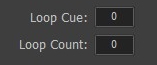 You may loop a series of cues by entering the cue to loop to from the current cue and the number of times the loop happens. The red X on the tool bar will stop the loop at any time.
 The up and down arrows are used to move the cue being edited up or down in the cue list. A number can be entered directly and the current cue will move to that line.