Fixtures
Fixtures


|
Fixtures |
Previous Top Next |
 The Fixtures screen is designed to work with the newer LED lighting instruments and any color scrollers you may have. The first step is to select a particular fixture from the top dropdown. One of the options there is to Add a new fixture. Unfortunately, there are only about 10 profile files included in this install. If you add fixtures, it would be great if you could forward their settings back to Baxel Data and we will include them in future software releases.
Having selected a fixture, the starting DMX address of an installed fixture of that type and a Note to be used as a hint on the main screen would be entered and Save clicked.
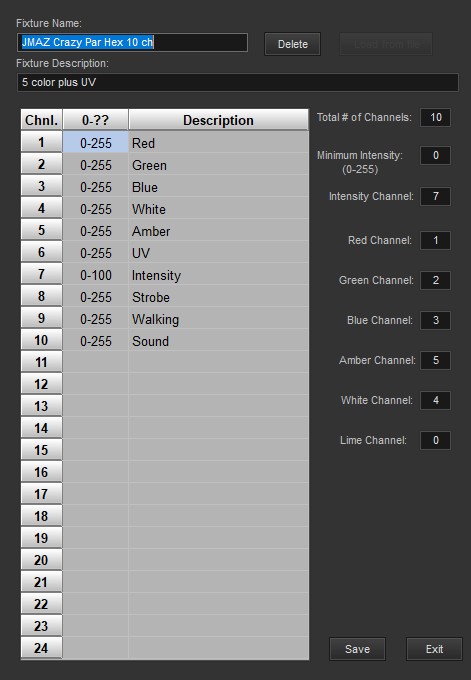
Adding or editing a fixture will bring up this screen:

The Name and Description are the text you want to recognize the unit by. Known fixtures that have a profile already can be loaded via the Load from File button. The DMX channels for the colors, intensity levels, and movements need to be entered, as well as the total number of channels to set aside for this fixture. The minimum setting for Intensity can also be entered. You can select whether the display goes from 0 to 100 or 0 to 255 and enter a channel description that will show up as a hint for that channel on the main display. When you Save, a file will be written you can use to Add.
A completed screen could look like this:
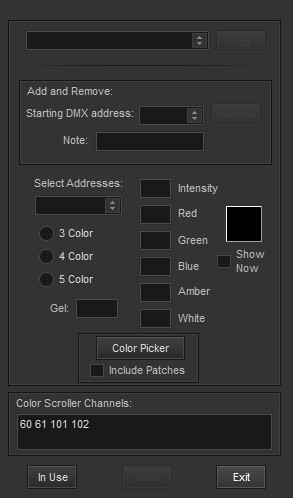
Going back to the Fixtures screen, having selected a fixture, the address or addresses of where these fixtures are installed is entered in the Add and Remove box.
3 Color 5 Color
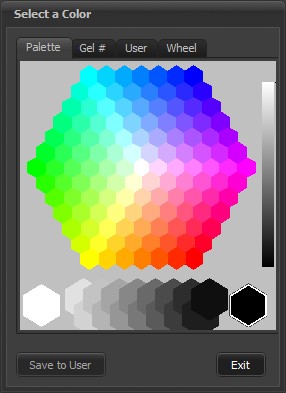
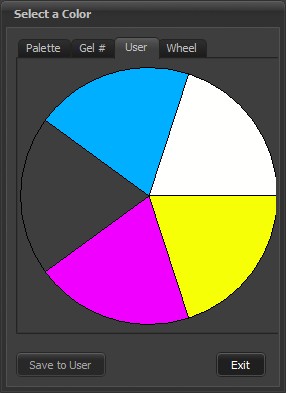
Next, using one or more of those addresses, a color picker can be displayed to choose the combination of RGB needed to produce the color you want. Also, entering either a Roscoe (Rxx) or Lee (Lxx) gel number will show its color and corresponding RGB values. If the Show Now checkbox is checked, the colors will be sent to the fixture as you move the mouse. If the Include Patches is clicked, then any softpatched fixtures to that address will also show the color. When the Save button is clicked, these values will be written to all the correct locations for the fixtures you selected.
To make it easier to select often used colors, the concept of a "user palette" is available. The LED values need to produce various colors will vary from manufacturer to manufacturer and/or fixture type to fixture type. The values used to make the colors consistent at a venue can be saved and recalled.
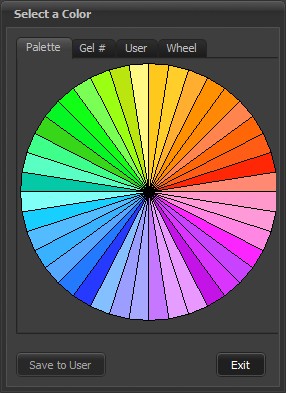
The Save to Palette button will add the current values of LED levels to a slice of the User palette. Here is an example:
To use palettes, enter a value in the level field of the palette (abitrarily picked as the Red) channel. For example, a fixture is set to address 150 and it's Red channel is 1. Normally, Red would therefor be set by values in channel 150. In the channel display it will appear like this: 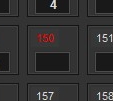 Entering a user palette number in channel 150 while the Alt key is pressed will set all the LED addresses of the fixture to the proper values for that color.
A right click in any channel box of a fixture will open the fixture window with the installed address selected.
Entering in the addresses of the scroller channels will allow them to be set from 0-100 or 0-255 as per your Preferences and not be affected by a Blackout command.
The 'In Use' button will bring up this screen for example:
 A list of the currently assigned channels and their fixture names serves as an aid to adding new instruments.